If you are a Software Engineer at a company where security is important and is taken seriously then you are probably also having a hard time developing modern software. Modern tools and frameworks tend to trust the Internet a lot more than say your network security folks. For example, redirecting Docker to not pull from the central repository first is nearly impossible. For years the answer to developing in a secure manner meant being disconnected from the Internet (air-gapped) and or traversing some fairly aggressive network proxies such that a simple “gradle build” command will not work because it cannot reach maven central to pull down 3rd party dependencies. You and your security personnel do not have the same goals. They are trying to insure that your company doesn’t make the 6 o’clock news as the latest hacked victim and you are trying to get shit done.

I believe there is a way to make everyone happy. I’m going to start a new series on this blog that documents an architecture for a Secure Development Enclave (SDE). This SDE will able to support the newest technologies, from Microservices and Kubernetes to complete continuous deployment pipelines. This will focus on the dev side of DevOps and will draw from my experience (and heartaches) from working in these highly secured environments as a Software Engineer. This will not be just a theoretical exercise. I will also be building out a test lab to validate the architecture.

The backbone of any development environment are the users. Which means you need to be able to manage users. The more users you have the harder the system is to manage. A centralized user management system helps greatly.

Nobody likes to manage a bunch of passwords. Its nice to have a single username and password for the entire dev environment. If you have an existing Active Directory you might want to leverage that. However, I don’t really recommend that approach for 2 reasons. First you as a software engineer probably do not have access into the company infrastructure, so you will be at the mercy of your IT dept and unless you want to entire company to login to your dev environment you might want/need them to create a group for you you to filter logins.  Second, most of the tools you will probably be using or are currently using are more geared towards true LDAP backends.

Only one problem, traditionally LDAP is hard for everyone to use and manage. LDAP servers typically don’t have an easy way for a user to set or reset their own password. Usually they are just data stores for information about people. This is where FreeIPA comes into play. FreeIPA is a complete user management system that includes a LDAP Server (RedHat’s 389 Directory Server) as well as a fully featured self service portal. FreeIPA goes well beyond a simple directory server in terms of features and can even support One Time Passwords (OTP), in case you have some severe security requirements.

Out of the box, Jenkins comes with LDAP support. No plugins are needed for this. This tutorial will walk you through setting up FreeIPA and connecting Jenkins for user authentication.

Software Versions Used:

Hardware:

MacOS Workstation with VMWare Fusion 7


Step 1. Prepare

Its not an absolute necessity, but I am going to setup some DNS entries on my local LAN. I will say that the FreeIPA server needs to resolve DNS correctly. and won’t be happy with pure IP addresses. So at a minimum I would edit it’s hosts file to include the IPs for itself and the jenkins server.

192.168.100.100 ipa.internal.beer30.org
192.168.100.101 jenkins.internal.beer30.org

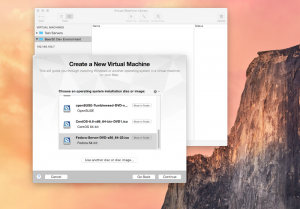
You of course need a place to run this. I’m going to do it in a virtualized environment on my Mac. I have the Fedora 22 Server ISO image downloaded and ready to go. But just about any other hardware/virtual environment will work.


Step 2. Create FreeIPA Server

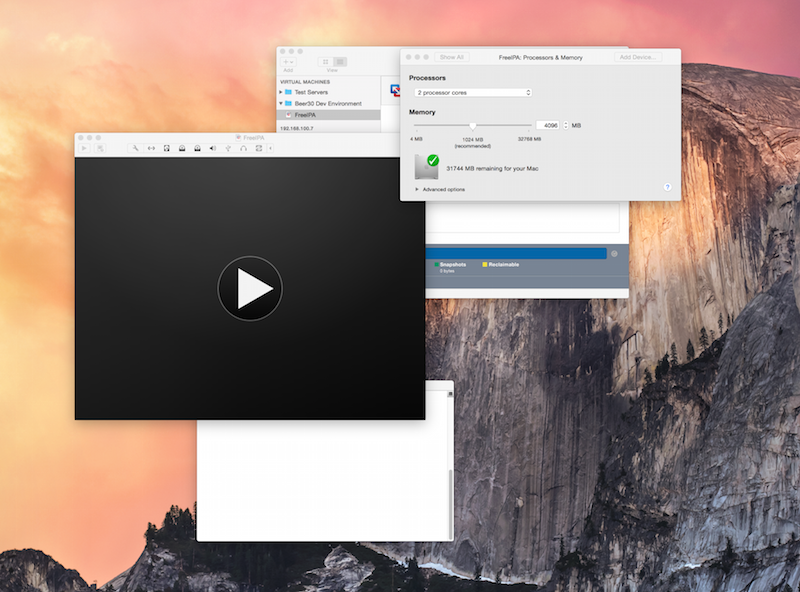
I’m using a virtual environment so I will select my install ISO (Fedora 22 Server)

New Virtual Machine


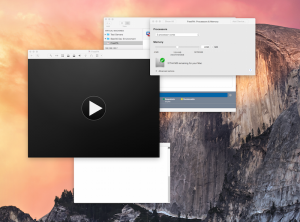
I like to give my VMs at least 2 CPUs and 4GB of RAM, 8GB Disk to start as it makes the installation process faster. I might adjust this after the installation. I’m also going to setup my network so that it is in bridged mode so that it gets the real internal LAN address.

FreeIPA VM Setup

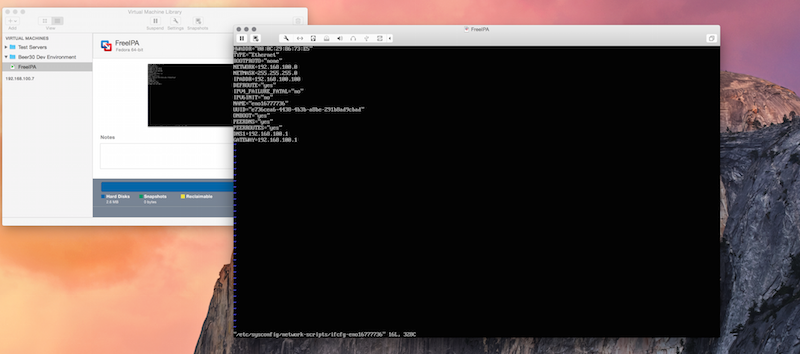
After that is all setup I can run the machine and it will do an “easy” install. Once the OS is installed I need to fix the network settings. The network will be setup for DHCP. I need my static IP and my Hostname set. So I need to edit a few files. Login and edit the hostname.


# vi /etc/hostname


Then edit the config file for the network interface

# vi /etc/sysconfig/network-scripts/ifcfg-<some id>  (or use the admin tool gui)

FreeIPA Edit Network Settings


Now reboot

# reboot

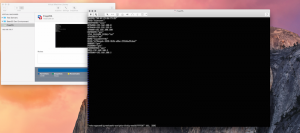
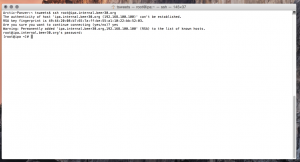
Once the machine is back up, from a terminal window on my host machine, I should be able to ssh into that VM.

SSH into FreeIPA


Once logged in you can install FreeIPA from the repo.

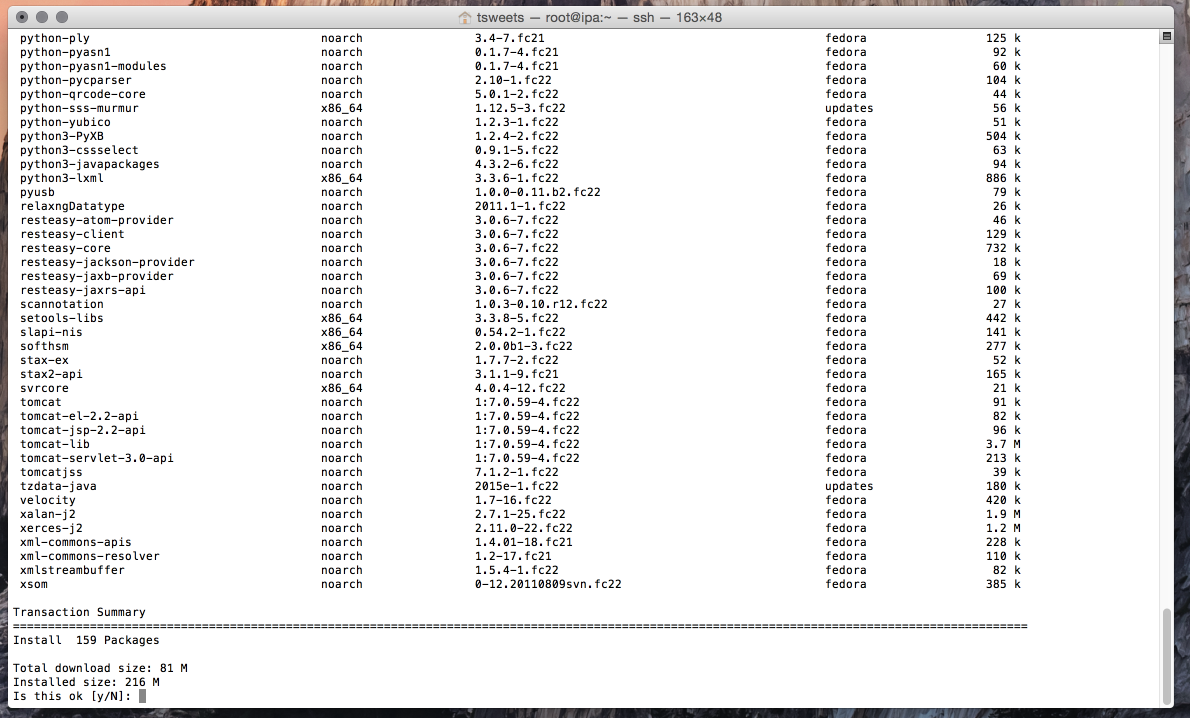
# dnf install freeipa-server

tsweets — root@ipa:~ — ssh — 163×48 2015-07-20 19-59-44

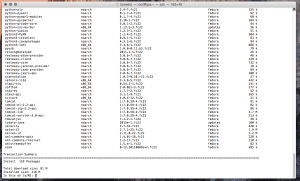
As you can see there will be alot of packages to install/update. Type Y and let it go.

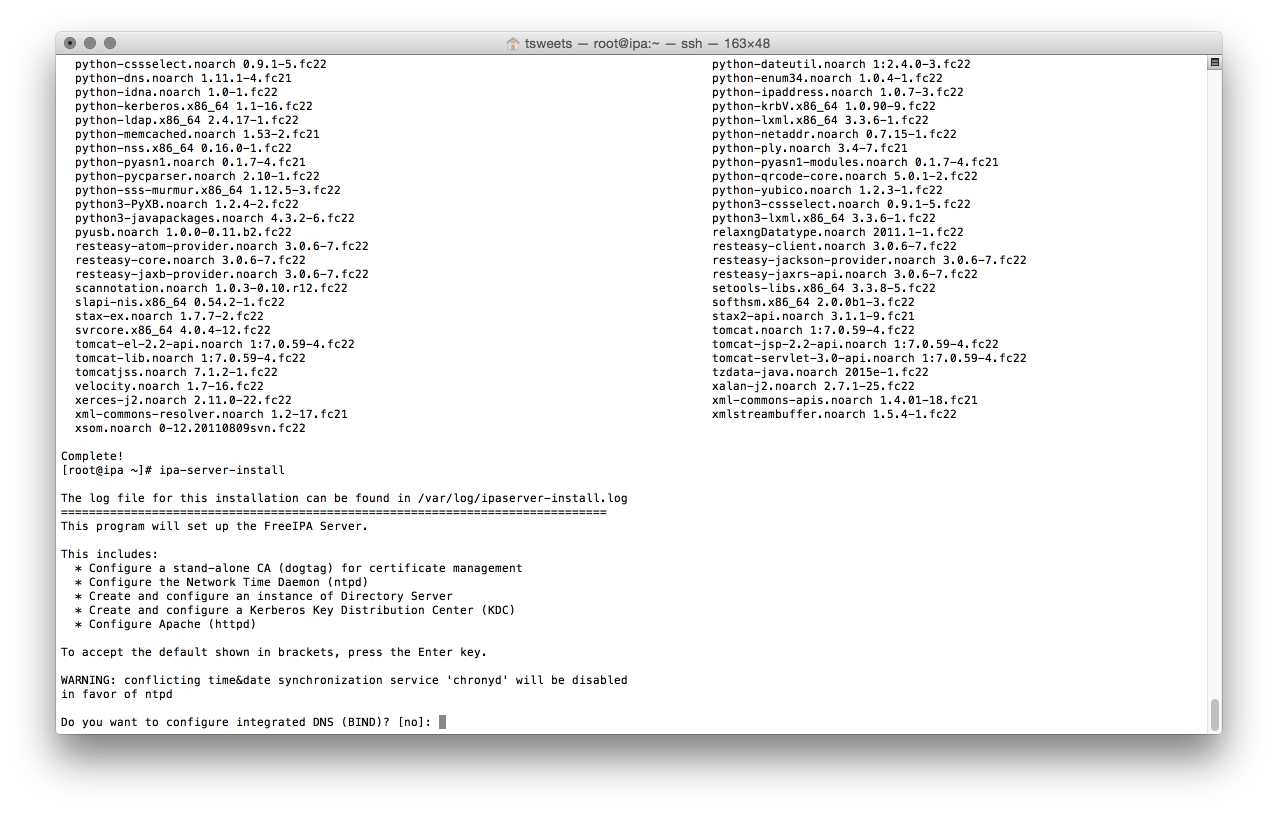
Once that is installed. you need to configure the application. This is easily done with the included config script “ipa-server-install”.

# ipa-server-install


ipa-server-install

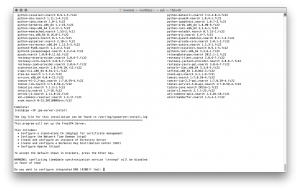
First thing it will ask is if you want to install BIND (a DNS server). I chose no as I can manage my own internal DNS, but this might be useful in a corporate environment and you cannot easily add entries in the company’s DNS server.


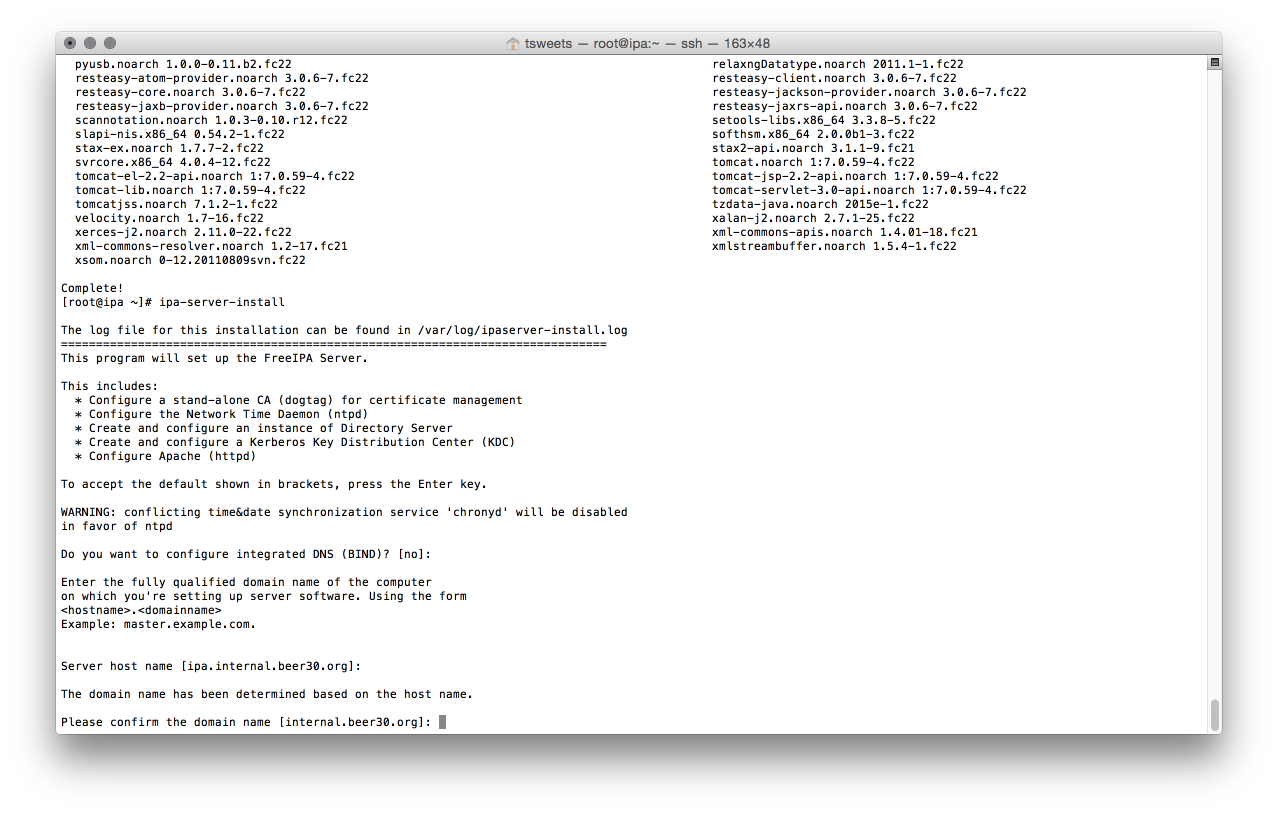
It will ask for host/realm names (but it chooses reasonable defaults)

tsweets — root@ipa:~ — ssh — 163×48 2015-07-20 20-18-28

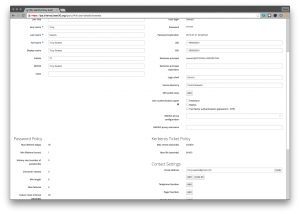
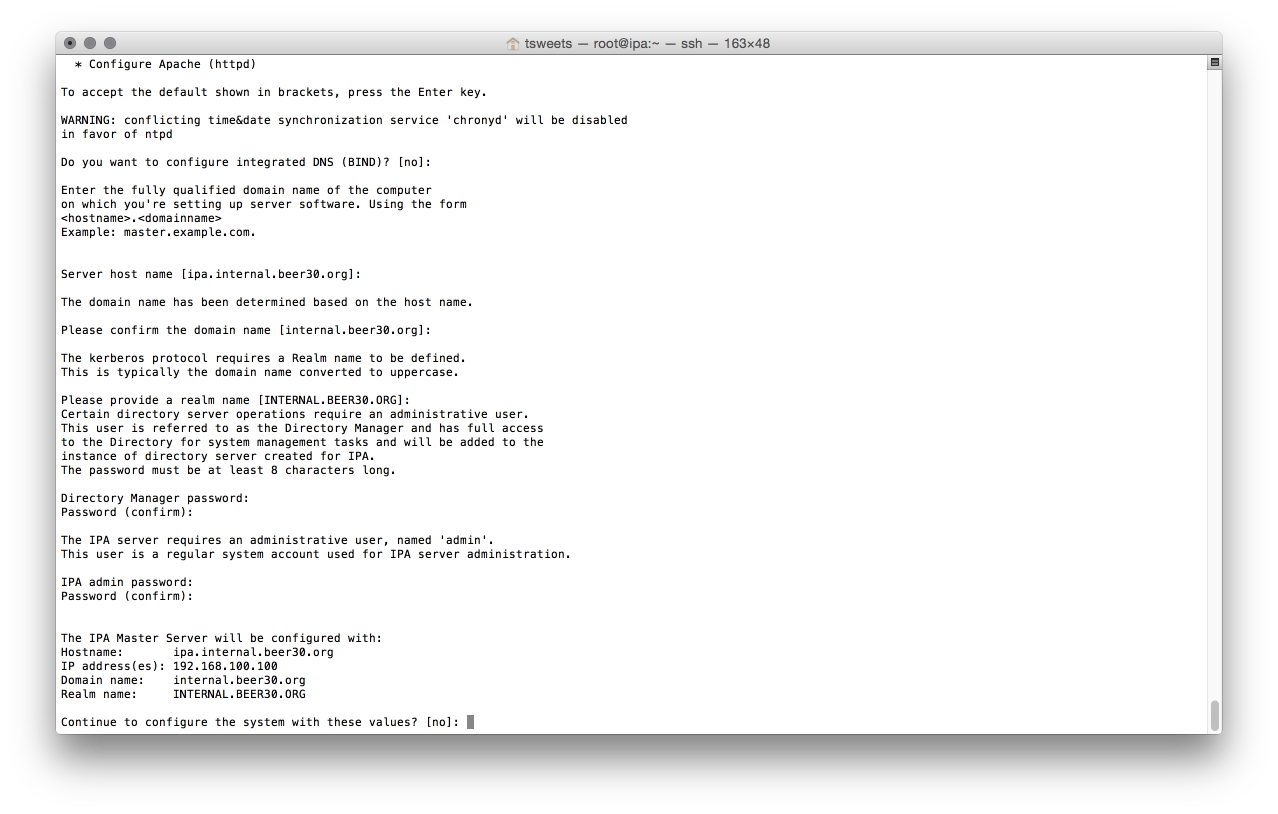
It will then ask for passwords for the admin and directory manager accounts and finally will show you the results for confirmation. Its also a good idea to cut and paste the configuration into a notebook for future reference.

tsweets — root@ipa:~ — ssh — 163×48 2015-07-20 20-19-01

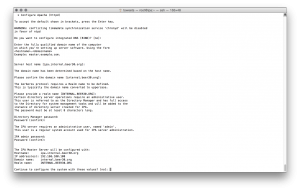
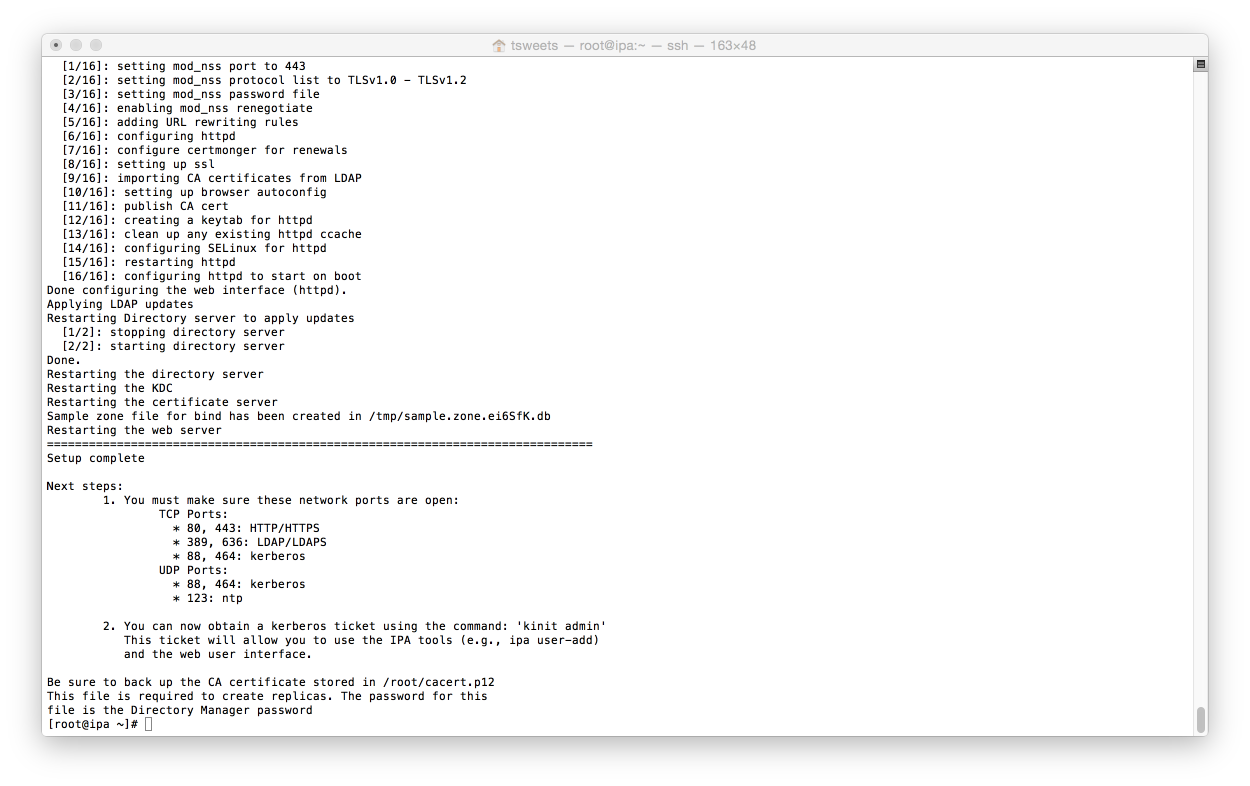
Once you accept the values it will go ahead and configure the system, This will take a little bit of time. At the end of the process it will give you a nice little summary of firewall ports that need to be opened. Two thumbs up to the script writer for that. 


tsweets — root@ipa:~ — ssh — 163×48 2015-07-20 20-22-15

I’m just going to turn off the firewall since I’m working in a test env.

# systemctl stop firewalld
# systemctl disable firewalld


At this point you should be able to open a web page to the FreeIPA server.

Goto to the address you have setup and it will redirect you to the correct URL.

IPA: Identity Policy Audit 2015-07-20 20-26-34

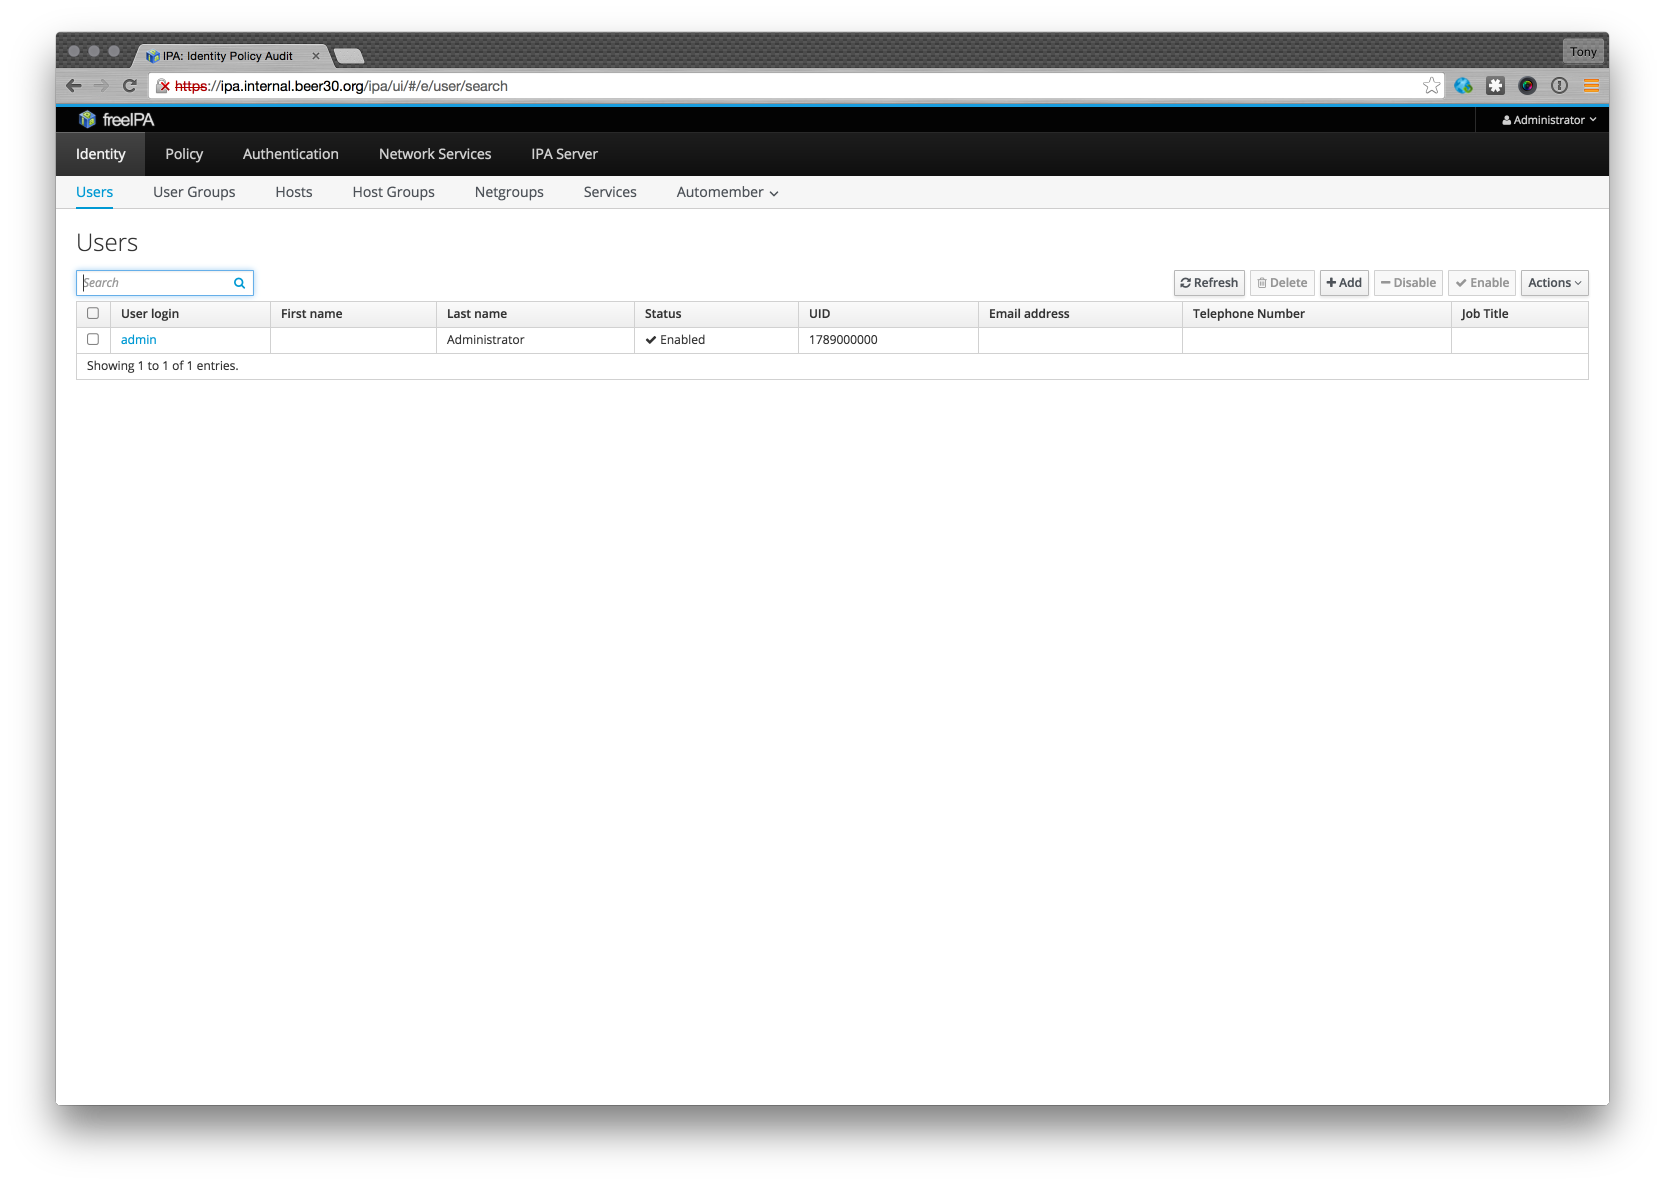
Login with the admin user and the password you setup.


IPA: Identity Policy Audit 2015-07-20 20-28-18

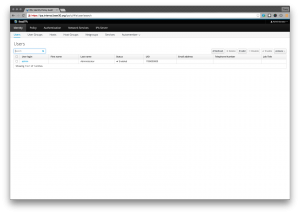
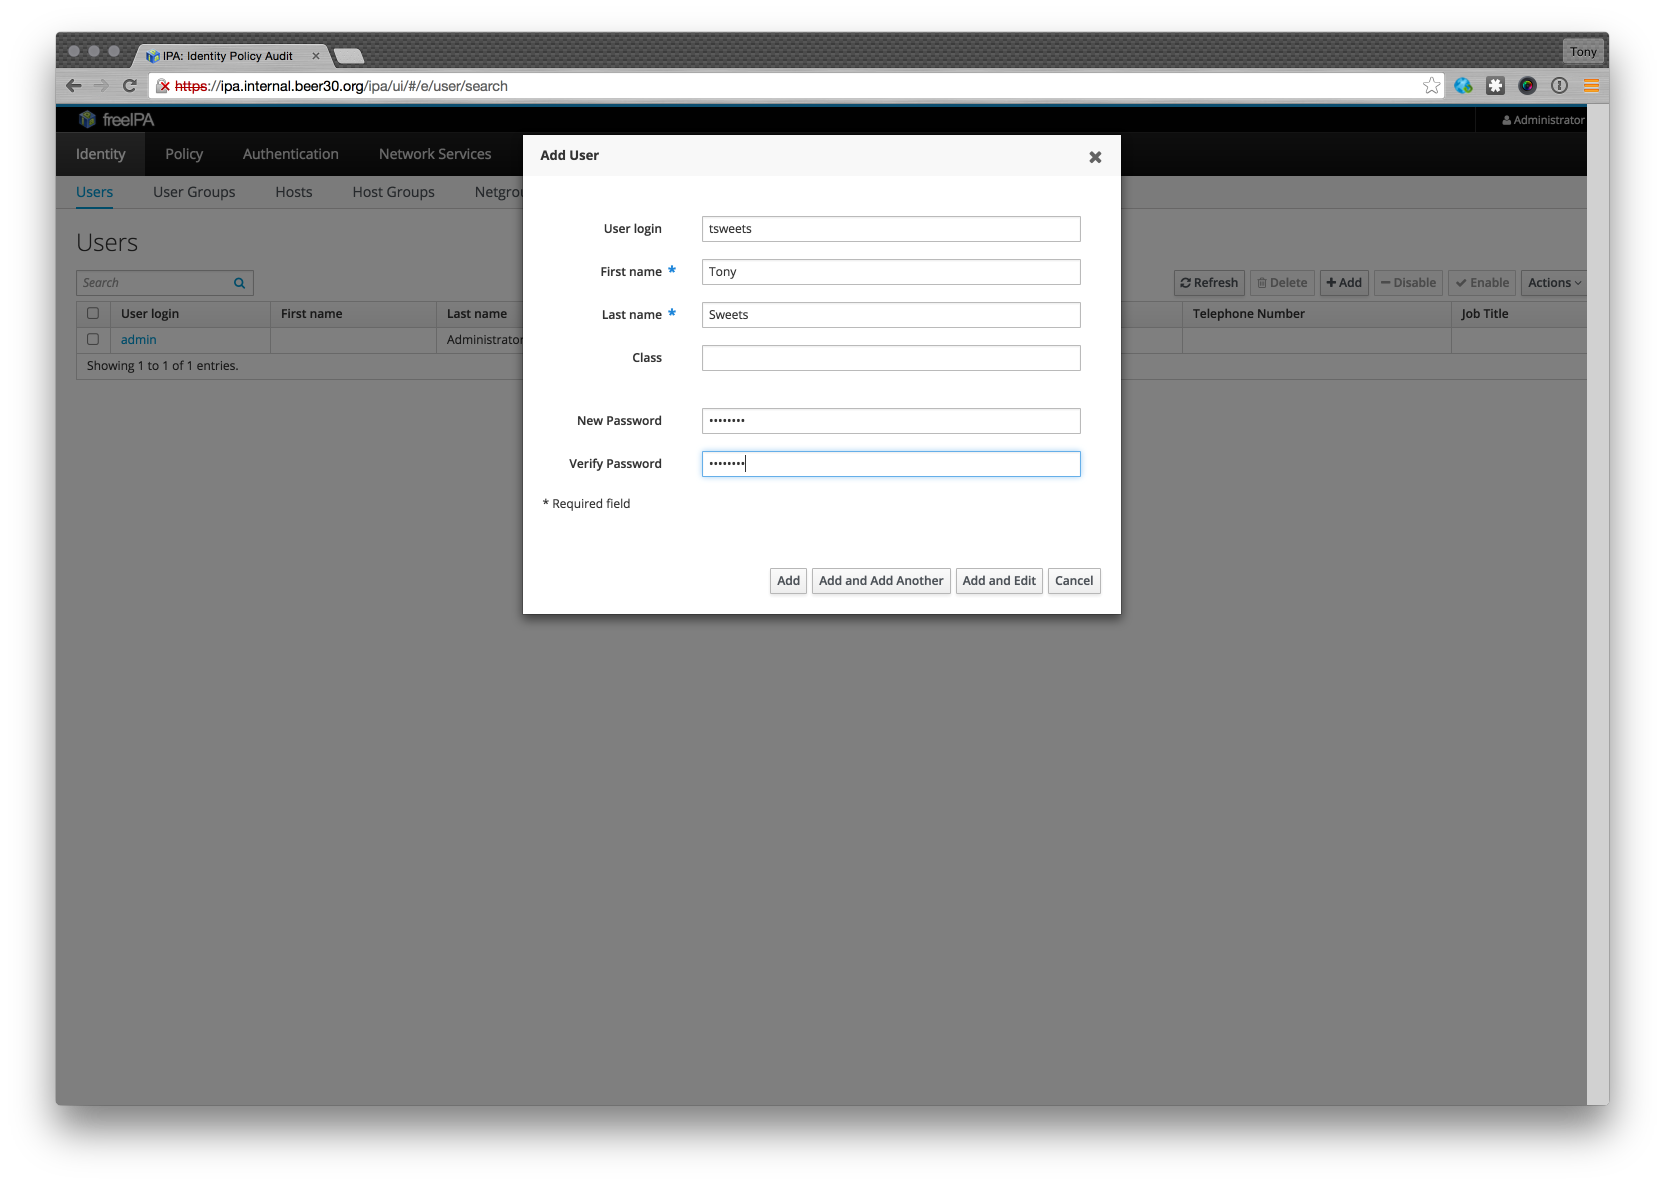
Now I’m going to add a user to the directory

IPA: Identity Policy Audit 2015-07-20 20-28-46

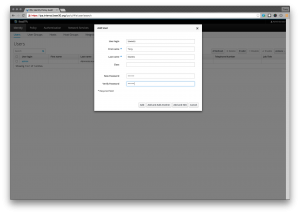
I also need to edit that user so I can put in an email address

IPA: Identity Policy Audit 2015-07-20 20-29-40


That’s it – I’m done. If I wanted to test that LDAP login works. From a different unix box with ldap tools install I could do something like.


# ldapwhoami -vvv -h ipa.internal.beer30.org -p 389 -D "uid=tsweets,cn=users,cn=accounts,dc=beer30,dc=org" -x -w SECRET_PASSWORD


If the username/password works you will see a success message.


Step 3. Install Jenkins

Now repeat most of everything you just did to get a base server you can ssh into.

  • Create VM
  • Login and set hostname (jenkins) and static IP address.
  • Reboot and login from remote/host machine.


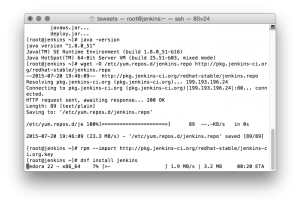
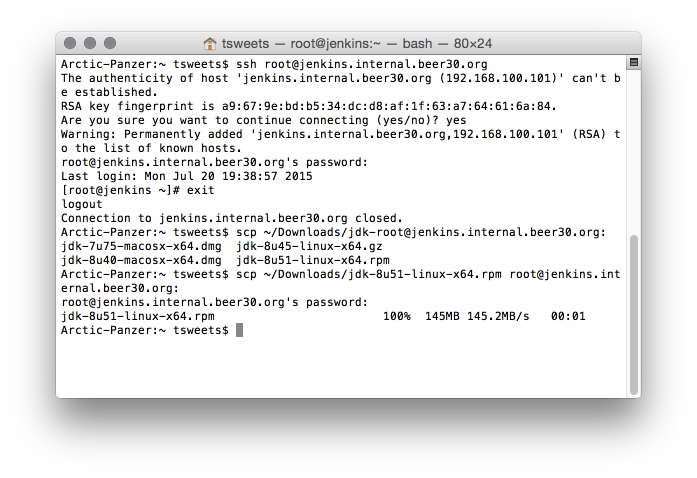
Jenkins is a Java Application and its installation will install OpenJDK. This is ok — But as a Java developer I prefer to use the real Oracle JDK. I have it downloaded and I will scp it to my Jenkins VM.


tsweets — root@jenkins:~ — bash — 80×24 2015-07-20 20-43-51


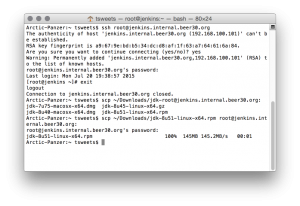
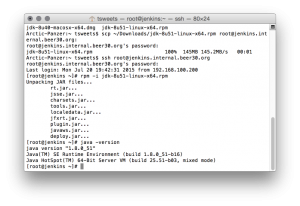
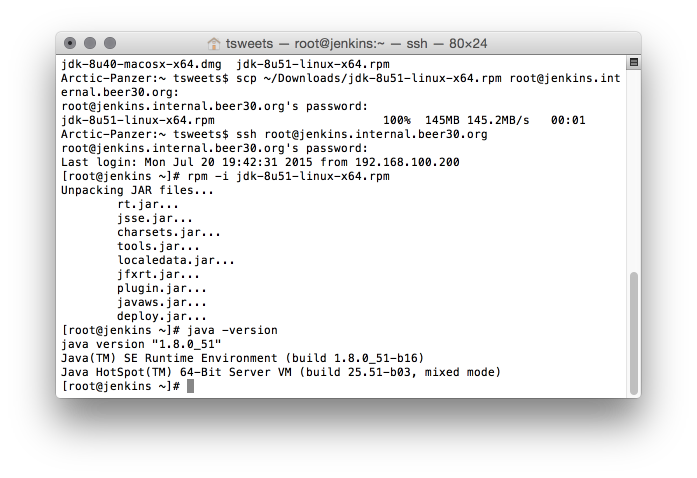
Now I can login to the jenkins vm and install the JDK.


# rpm -i jdk-8u51-linux-x64.rpm


tsweets — root@jenkins:~ — ssh — 80×24 2015-07-20 20-44-38

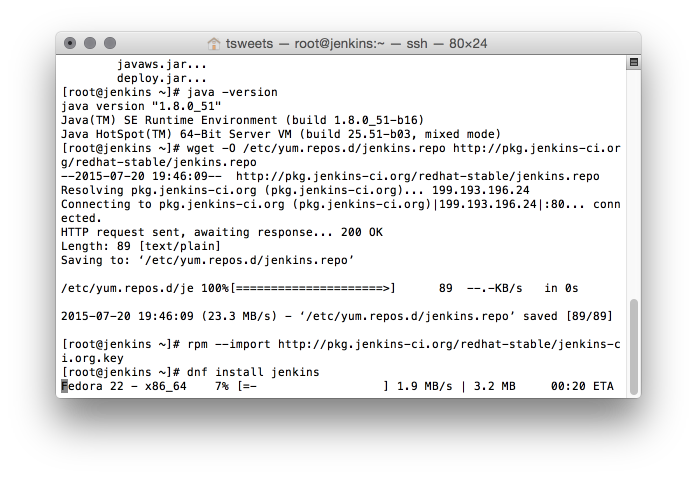
Now lets install the LTS (Long Term Support) version of Jenkins. If you goto jenkins.ci.org they will give you some simple instructions to do an install from their repo.

# wget -O /etc/yum.repos.d/jenkins.repo http://pkg.jenkins-ci.org/redhat-stable/jenkins.repo
# rpm --import http://pkg.jenkins-ci.org/redhat-stable/jenkins-ci.org.key
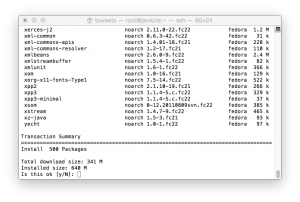
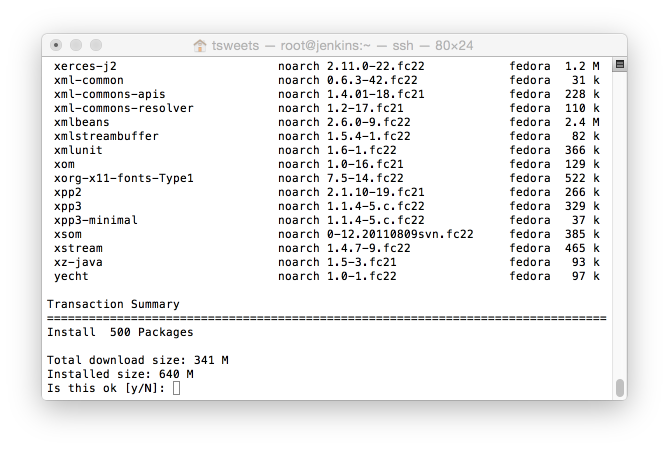
# dnf install jenkins

tsweets — root@jenkins:~ — ssh — 80×24 2015-07-20 20-47-08

It will install a bunch of packages. I don’t really think even half of these are needed. And you might have notice in all things scrolling by that it will install OpenJDK. This is bummer to me. So I’ll have to fix that once its done.


tsweets — root@jenkins:~ — ssh — 80×24 2015-07-20 20-48-07


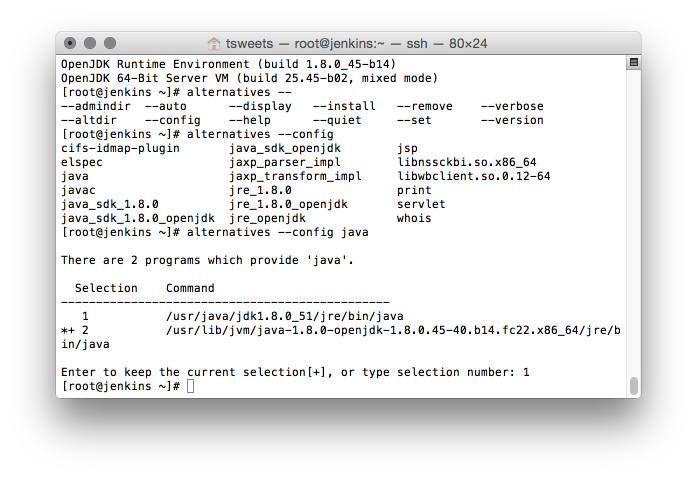
Once that is complete you will have 2 JDK’s installed. OpenJDK will be the default, however that is an easy fix with.


# alternatives --config java

tsweets — root@jenkins:~ — ssh — 80×24 2015-07-20 20-53-12

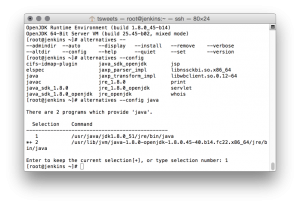
and select the Oracle JDK (the one that doesn’t have openjdk in the path)


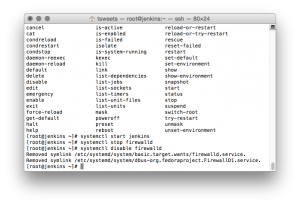
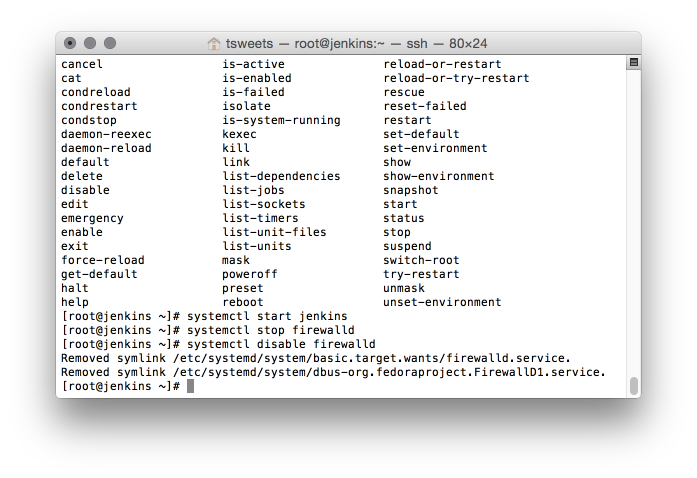
Now I can start up Jenkins. I’m also going to disable the firewall.

# systemctl start jenkins
# systemctl stop firewalld
# systemctl disable firewalld

tsweets — root@jenkins:~ — ssh — 80×24 2015-07-20 20-55-07

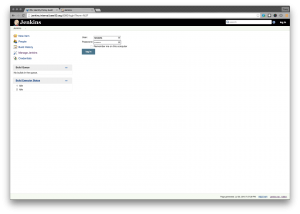
Use a web browser and goto the jenkins server on port 8080.

Dashboard [Jenkins] 2015-07-20 20-55-16

Notice that you did not login and there are links to manage jenkins and create new jobs. This means there’s no security setup.


Goto the “Manage Jenkins” link.

Click on “Configure Global Security”


On this page select “enable security” then select LDAP but make sure you leave “Anyone can do anything” under authorization until this all works.

Configure Global Security [Jenkins] 2015-07-20 20-57-17

Configure Global Security [Jenkins] 2015-07-20 20-56-51

enter in your host name for the free ipa server and under “User Search Base” type in “cn=users,cn=accounts”


Hit and Apply and Save


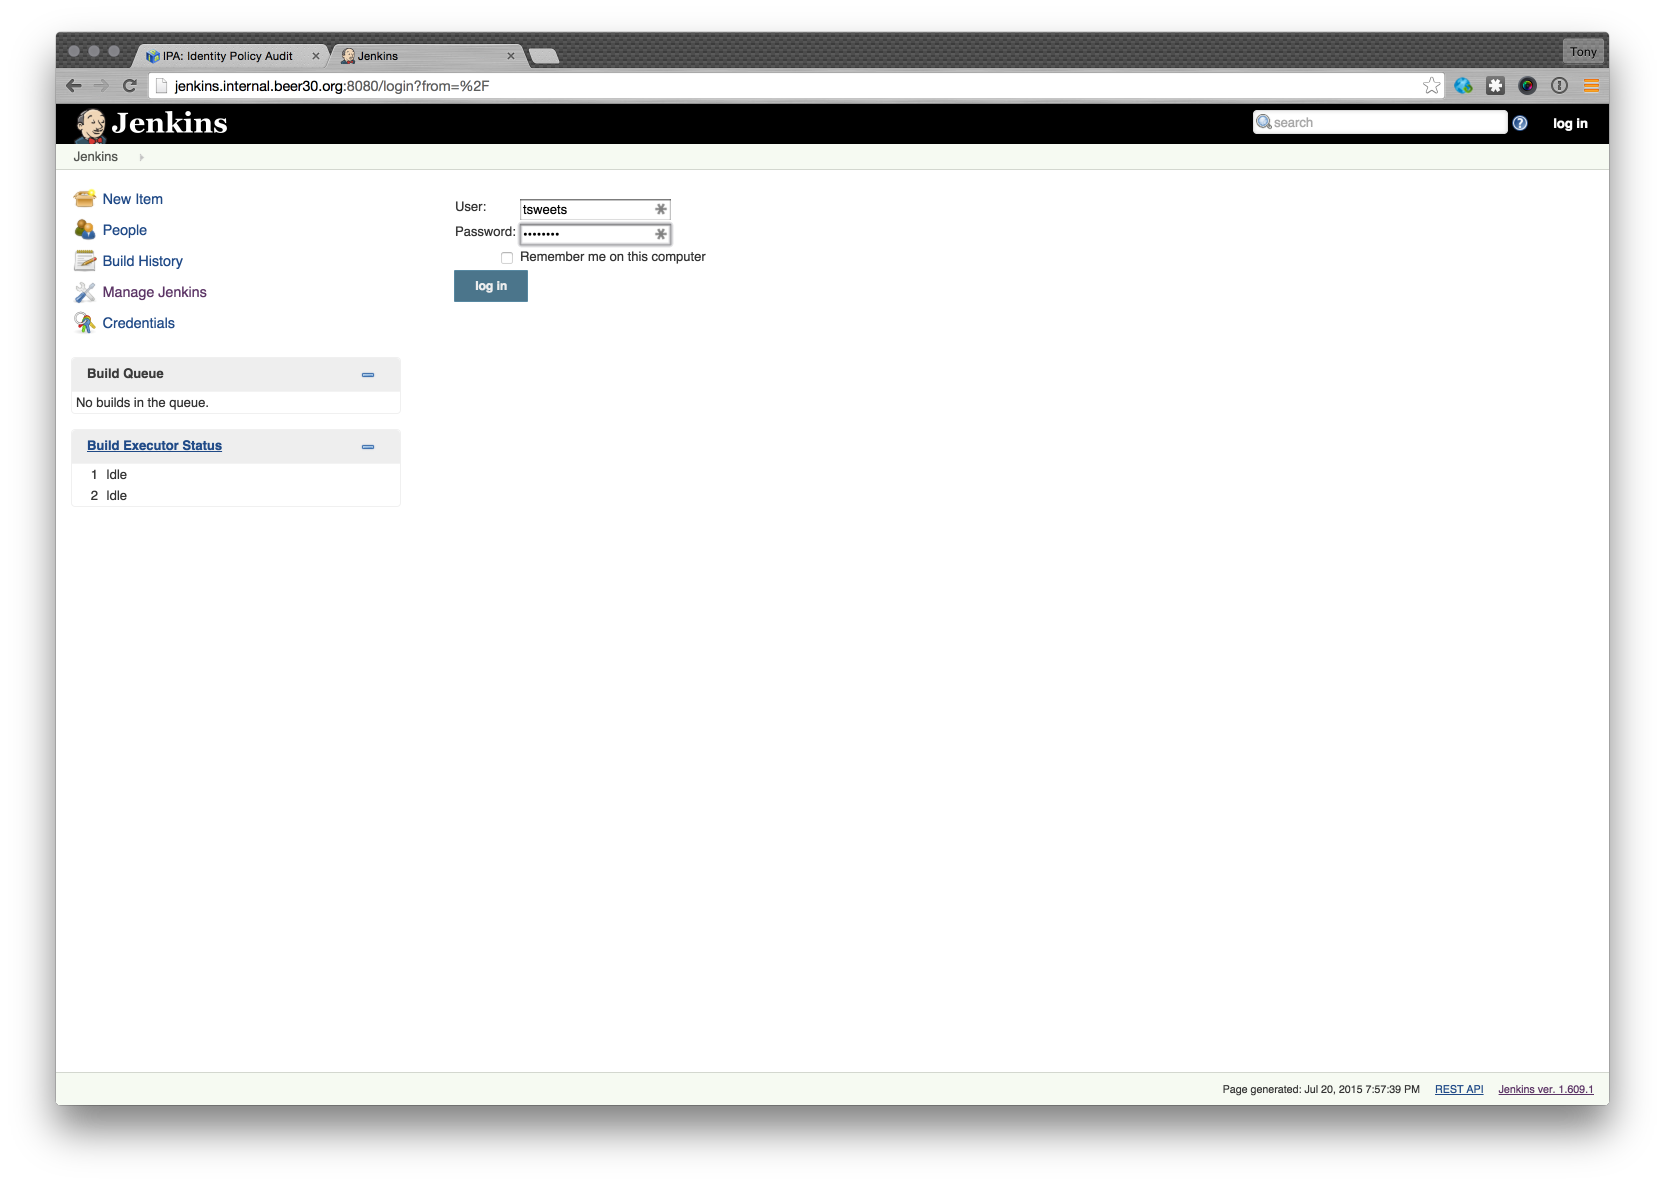
Go back to the Jenkins homepage and you should see a log in option now. Try logging in with the user you created on FreeIPA.

Jenkins 2015-07-20 20-57-50


If it works login will be replaced with logout and your full name should be next it that link.


No go back to the Security settings and set the authorization to “Logged in users can do anything”.

Configure Global Security [Jenkins] 2015-07-20 20-58-31


Logout and now the page should have fewer options.

Dashboard [Jenkins] 2015-07-20 20-58-55

Notice that the home page says “Log in to create new jobs” now and also the manage jenkins link is removed.

Now login and will see manage jenkins link and will be able to create jobs.

Dashboard [Jenkins] 2015-07-20 20-58-07


thats’ it. Jenkins is now using LDAP to authenticate users. If you need to get fancy with permissions you can with the “Matrix Based” security options and have only certain users or groups do certain things. For example you can have a group that can view jobs but not run them.

Oh and to show that we are indeed on Oracle Java 8.


goto the System Properties page under Manage jenkins, you’ll have to login first and look for the java.vendor


System Information [Jenkins] 2015-07-20 21-06-49


DevOps Logo

Networks

It is essential that my dev environment has access into production. It is how code get’s pushed into production. So I have a Site to Site VPN into my AWS infrastructure. One of the nice things about AWS is that they actually have a VPN service and it uses standard IPSec so it can connect to just about anything.


Continuous Delivery with DevOps

Continuous Delivery is not easy to get right and its hard to implement after the fact. Depending on your database this might not be fully possible at all. It is not in my environment. If I have to roll back a release, I’m going to loose data. Before I do a release I need to determine how it will affect the database. Nine times out of Ten, I have no DB changes. Most of the time If I do have a change it is mostly just adding a column, however. Sometimes I do a little bit of a refactoring and this becomes a big deal. Typically I’ll have to schedule some downtime. Even though I can’t exactly have my system automatically deploy My system architecture supports it. There’s essentially two categories for deployments.


  1. Deploy onto existing systems, just update your application code
  2. Build fresh systems (Automatically) with the latest code, once everything is ready point the load balancer to the new set of systems.


Option 2 is best thing to do. This makes your system very agile. This system can be deployed just about anywhere. Upgrading systems becomes painless. You are never worried about rebooting a machine to do some sort of system update, because you are affectively always rebooting.


It does require a different way of thinking. The VM needs to treated as something that is volatile, because nothing about it will be staying very long. Think about it as something that is disposable. First issue will be logs. You need a way to offload the logging. Second issue will be file handling. If you are keeping an archive of files these will disappear with the next release.


Centralized Logging

In my past I ran into a nice Centralized Logging system named Splunk. Splunk is great. It can aggregate logs into a central source and gives you a nice Web Based UI to search through your logs. Only issue for me, is that I’m on a budget and the free one is quite limited in the amount of logs it can handle and that is where the ELK stack comes into play. ELK stands for Elasticsearch, Logstash, and Kibana. These are three open source applications that when combined creates a great centralized logging solution.


I like running a log forwarder agent on the app server and gather not only my application logs, but the system level logs as well.


File Management

My system uses a lot of files. It downloads files from remote sources and processes them. It creates files during batch processing, and users can upload files for processing. I want to be able to archive these files. Obviously archiving on the box is a horrible idea. There are a couple of solutions though.


File Server

The easiest thing to do is to setup a file server that is static and is never destroyed. Your app servers can easily mount a share on start up. However there are some concurrency issues. 2 processes can’t write to the same file at the same time and there’s really nothing from preventing you to do so.


Amazon S3

Along the same lines of a file server, S3 can be mounted and there are also APIs that can be used to access “Objects”.


Content Repository

If you Like the idea os API access instead of File System Access, but would feel better if your files were still in an easy accessed (and backed up) system, then a Content Repository is probably for you.


System Configuration Management

This is the part confuses people about DevOps and why I get so many recruiters that say they want DevOps when they really want a System Administrator. Configuration Management in this context is also known as “Infrastructure as Code.” The theory is that instead of manually configuring a system, write a script that commands a CM tool to do it for you. This makes the process easily repeatable. There are three main tools in space (Sorry if I don’t mention your favorite). They are Puppet, Chef, and the new kid Ansible. If you are going to learn and one, I would pick Chef. Mainly Chef, because AWS can deploy system configured via Chef through their free OpsWorks tool. The configurations that you create are just files that can then be checked into source code control and versioned.


With a CM tool you can create the identically configured machines. This makes it a simple process to have a set of machines running one version of your code behind a load balance, while a second set is coming ready to switch over. Thus completing your continuous delivery pipeline. Just have your deployment script reach out to the Load Balance and have it start routing traffic to the new set of servers.


But wait there’s more

Ideally you will have your CM tool creating virtual machines basically on the fly. But vm’s are so 2014. Today we have containers. One of the first thing you will notice when creating a machine from nothing with a tool like Chef or Puppet, is how long it takes from start to finish where it is actually ready to take web hits for your app. A lot of that time creating the vm in the hypervisor, allocating disk, installing the operating system, doing updates, install installing software, and the list goes on. Containers are lightweight pre-build runtime environment just containing enough software to serve a single purpose. It runs as a process on the host system making very efficient, especially in terms of memory usage. We kinda gone full circle a bit. We used to jam everything onto a single server. Then we split everything into separate virtual machines. Now we can bring everything back onto a single server but each container is isolated and managed as a single unit.


Containers are very cost effective, because your host system can be and should be a virtual machine. Instead of paying for 10 small virtual machines you could get by with 1 or 2 large ones. It would depending on Memory and CPU usage.


Conclusion

Hopefully by now you have some insight on retrofitting a legacy project with a DevOps process. Lets recap. Steps to retrofitting your legacy project.


Step 1. Get the Tools in place

Step 2. Automate Your Build

Step 3. Automate Your Tests

Step 4. Automate Your Deployments


See a pattern here? Automation is key. Fortunately for us, we are software developers. This is what we do. We take manual processes and write software to automate them.


This has been a high level overview of a specific project of mine, but I believe its relevant for many other projects out there. Future articles are going to focus more on the technical side of things and will be more of a set of how-tos.

DevOps Logo

The DevOps Environment

At some point in beginning of the retrofit I had freed up our old production equipment. I brought it all back to office and kept the two most powerful servers (HP ProLiant G5) to repurpose as my official test and dev environment. I did also purchase a NAS device so I could have some reliable shared storage. With the two servers I loaded up Xen Server and created a Virtual Sever Environment to start loading up VMs. This is what I ended up with in this environment.

  • Build Server (Jenkins)
  • Three Build Slaves (Linux Jenkins Slaves)
  • Archive Repository (Apache Archiva)
  • Code Repository (Git – Atlassian Stash)
  • Project Management Tool (Atlassian Jira w/ Greenhopper)
  • Wiki (Atlassian Confluence)
  • Test Database (MySQL)
  • Four Application Servers (Linux/Java/Tomcat and/or Glassfish)


Later on I added a Ubuntu linux Workstation VM so I could use it as linux desktop.


How does this work

So this like a lot of machines with a lot of things going on, and it is. I will try to explain the roles of the servers by explaining how my development and deployment pipeline works. Below is the workflow of a company requested feature with some of the DevOps processes mixed in


Step 1. PM (Project Manager) Inserts Enhancement Story in Jira – Story marked as DEMO-127. At some point in the future this store gets prioritized into a sprint.


Step 2. Sprint with DEMO-127 starts. Dev assigns DEMO-127 to them self and has Jira create a branch in Git


Step 3. Dev fires up Intellij checks out the DEMO-127 Branch. Works on the story


Step 4. Dev completes story checks into repo with a comment that contains DEMO-127


Step 5. Dev pushes branch and merges back into the “develop” branch


Step 6. Jenkins Builds develop branch. Adds a comment into Jira. Starts with a quick compile job then moves to testing jobs. It farms out work to build slaves.


Step 7. Everything passes, Its decided that this is releasable.


Step 8. Run the Master build which merges develop into master and pushes out to production.


Test Automation

My team does not have any full time testers. We just have people that try out the latest features, usually its something they have requested. So I write all of the tests. And I do everything with JUnit. I have three different types of tests as described below.


Unit tests: I write JUnits – pretty simple, seen one seen them all kinda of a thing.


Integration Tests: I use JUnits and the Spring Testing framework. This can auto-wire in all of the needed services and configurations. These tests will bring up the Spring context and can actually hit the database. These tests usually add their own data. So they will start by creating all of the needed data for running the test. Without relying on any seed data to be present.


GUI Tests: Still use JUnits. However these JUnits drives Selenium Page Objects.


Why use JUnits for the base of everything? Because the results are pretty much a standard that a lot of tools will understand out of the box. I would say that these technologies are replaceable, especially if you have testers that don’t write in Java, however it needs to be something that the build server understands.

In the next article we will explore the production environment.

DevOps Logo

Typically you and your company will be at a breaking point. They want more features and you as a developer are trying to keep your head above water just on maintenance for the old stuff. For example a new security issue like this one we had http://cve.mitre.org/cgi-bin/cvename.cgi?name=CVE-2013-2251 could crop up and it is forcing an upgrade. But can you? Are you assured that you can make this upgrade and not break anything? You could make the change and re-test the entire system manually, but how long will that take? Can you get it done before some gains complete control of you server? Do you even know how to test the entire system? Are you agile enough to get this done fast? If the answer is no then it is time to make some changes.


The DevOps side of you is saying you need automation. You need to be able to make a change and get that single change out the door and into production quickly. But how do you get there? Unfortunately there is not a single thing to do or change that is going to make this happen. In our case study, everything needed to be changed.


Lets start with a goal. I made a goal for the system. I wanted to have a single change come in from the business or myself and have it pushed out into production in under a week. I decided we needed to cut development cycles down to 1-week sprints. Before I got there the company was used to 4-6 month projects. This was a hard culture change to get through to people.


One of first things the CEO wanted to do when I came onboard was to plan out the next year. Instead I persuaded him to just focus on the current priority now. Because no matter how well we do, whatever we think we should do 6 months to a year from now typically won’t be at the top of the priority list anymore. Basically I was saying to him. Lets be Agile.


We needed to change the project so that our project could handle change. We needed the whole process to be greater than the sum of its parts. I knew that if we were firing on all cylinders, and if all of tools were integrated and automated, and we had a highly sophisticated continuous integration pipeline, then productively would rise and we would be in a lot better shape. This is the basic goal of DevOps.


What is DevOps

I get a lot of recruiters contacting me, claiming that they have an Urgent need for a DevOps person. Unfortunately the job description usually says otherwise. Typically they want a System Administrator. The Wikipedia Definition of DevOps is:


DevOps is a software development method that emphasizes communication, collaboration (information sharing and web service usage), integration, automation, and measurement of cooperation between software developers and other IT professionals.


I think the most important part of this definition is that DevOps is a “Software Development Method.” It is not just a buzzword. It is a Software Development methodology not a System Administration methodology. It is going to take some sys admin skills, however.


Making changes in Baby Steps

First thing on my plate was to setup some tools. I brought in an old Dell workstation from home; put it on my desk and setup VM Ware workstation on it. I needed some virtual machines to run the tools required to kickoff this process. I bought with my own money a starter license of Atlasssian Jira and Greenhopper. I did not want money to be a barrier to upper management. It would be easier to show why we needed to do this, than explain. But more importantly, I need these tools in place ASAP. I wanted the project manager to start writing stories and capturing them in more public way, immediately. Before she was using Microsoft Word and Project. It was a little bit of a fight, but after she started to research Scrum and Agile she was willing to give it a try.


For myself, I was in a bad spot. My number one priority was to figure out how they built the code and to be able to build it myself. I focused on the projects that were done from the command line, opposed to the projects build in the IDE. I also had a version issue. I wasn’t exactly sure which version of the code was running in production. There were tagged CVS trees and code that was being built in the IDEs that were slightly different. I decided to go with the latest CVS version and release that ASAP to see if anyone noticed anything missing so that I could have my baseline.


Once the baseline was determined I set out to reorganize everything into Maven builds. Once I have Maven builds for everything. I setup a Git Repo checked in everything and setup a basic continuous build system with Jenkins. At this point the code building process was truly platform independent. It did not matter anymore that I was using Intellij as an IDE apposed to Eclipse. Maven was the only dependent factor. I could basically walkup to any box with maven and git installed and do a:

git clone <a href="http://myrepo">http://myrepo
</a>cd project
mvn clean compile war

I would then have a war file to deploy. I deployed those and now I had my new baseline to work from.


Pieces are starting to fall into place

Now that I had a proper list of dependencies defined into my maven pom files. I was able to strategically dissect the application. I needed to find the low hanging fruit and I also needed to get to the point of what I call push button deployments. Where I could push a button in the build system and deploy code into production. I needed a way to make it less painful to do a release, because I would be doing a lot of them and doing them frequently. That’s a big part of releasing often. If the release process is absolutely painless it becomes simple to do. But first I needed some architecture changes on the database front.


It is a bad idea to do a cluster over a WAN link. A cluster over a shaky OpenVPN connection is even a worse of an idea. That type of VPN is really for road warrior type of users/clients and not network-to-network connections. Our databases would get out of sync often. So I broke up the cluster and had the remote app in South America connect to the database over the VPN connection. It was not perfect, but was a start to buy us some time. Eventually I planned a re-write that application to make web service calls instead and not have a database at all.


Enter the Cloud

I needed the cloud. There was no way I could also be system administrator to physical production hardware and also do this amount of development. Also given our physical server locations, it made it impractical to maintain, and it was just plain expensive. In my opinion there is only one public cloud choice. That would be Amazon AWS. Nobody can beat Amazon’s virtual network services. For example they have routers to create virtual private networks and load balancers that can host SSL certificates. And the price was cheaper than hosting at our sub-leased space at the co-lo.


Persuading the powers to be was difficult. I’m not sure why. I’m not sure if some FUD (Fear, Uncertainly, and Doubt) was being passed around the non-technical circles. But there was a lot of push back from people who were concerned that our data was going to be out there for everyone to see and have access. I partially blame consumer grade services like dropbox that were advertising “store your data into the cloud”. Things like that diluted the meaning of the “Cloud” and my management team thought that was what we were going to be doing. It was a hard for me to convince them that what we were actually doing was renting a slice of a server. I need a test case. I didn’t have to go too far to find one. Our junky FTP/SFTP server.


The FTP server I inherited was in bad shape. SFTP access wasn’t locked down. So if you had a SFTP account, it meant you really had a full SSH account into the box as well. Since this was on our production network, this had to go. Using a free for a year Amazon AWS linux instance in a completely isolated network, I setup a new server with only SFTP access. This provided enough evidence needed to show management that this can be done and its better than our current setup and it was cheaper as well.


After I got approval to move into the AWS cloud I started to migrate my apps over. I upgraded the Operating Systems but had to leave the JBoss application servers alone. The application required JBoss service archives and the JBoss server could not be upgraded to the latest version as the JBoss team decided to drop support for service archives in newer versions.


Think of Service archives as java programs that runs in the background and in my case they were doing batch like tasks. This was my first opportunity to do some major java refactoring. I decided to redo each SAR (Service Archive) as a Spring Batch Job and run it in a new up-to-date Tomcat Server. Once I was able to decouple all of the SARs out of my deployments I was then able to redeploy the main applications onto Glassfish Application servers. This sounds easy, but it actuality took a lot of time to get there. This new “Batch Server” as I called it was following all of the current best practices. Including unit and integration test automation, one click deployments, and all into the AWS Cloud.


With my base architecture and infrastructure in place, it was just a matter of time before I could say I reached my goal. Weekly I would release new code, adding more tests, and removing old things, at the same time adding new features to the system as they were requested.


In the next part I will go over my Test and Development environment. This is really the heart of it all. From the DevOps perspective this is where the magic happens.

DevOps Logo

Introduction

Legacy projects are hard to deal with. Unless you are directly involved with the development of the system, you do not have any idea how hard it is to maintain and worse change. Something that sounds easy, like adding a simple button on a single page could in actuality be a nightmare to accomplish. That single page could be generated in back-end code with some homegrown framework that spits out HTML as the user interface and it is actually used for every single page in the system. I like to say that the “Devil is in the details.” Without the details and firsthand experience with the specific system it is difficult to gauge the effort needed to accomplish a task. This is especially difficult on a legacy project.


You know need to modernize your project but the task is daunting. It makes your head hurt just thinking about it, you don’t know where to start, and you rather just keep working on getting that single page changed and hack in that button somehow. I’m going to define a Legacy Project for the purpose of this series of articles as a system that was written and deployed without any consideration for DevOps methods and practices.


I’m going to walk you through a scenario, except for this one actually happened, and it happened to me. I joined a small company as the only technical resource. The previous developer suddenly quit and the company was left with a custom credit card management enterprise application written in Java, but no one knew how to keep it going. There was a 2 to 3 month gap between the last IT Director/Developer and myself and there were issues piling up. For a time reference, this was in late of 2012.


My first day I was handed and external hard drive with my predecessors Windows laptop data and an Excel spreadsheet with host names and passwords. Oh and someone said, “Here’s where you sit and we are having some transaction settlement issues can you get on that?” Let the nightmare began I said to myself.


A coworker once said to me that I thrive in chaos. He was right, this was chaotic and I loved every minute of it. Let me describe what I was dealing with.


The Legacy System

There were four Java Based Web Applications, one of which had an Adobe Flex front-end. These were running on JBoss 4 (JBoss 7 was current at the time). A MySQL Database Cluster synced over an OpenVPN WAN connection. One database was in Denver Colorado the other was in South America (Don’t ask), with the other database driving a similar app to one in the US (but built for a different market). There were old hand-built servers acting as firewalls and an FTP server. The servers that were in Colorado where in a rack that was not being rented from the co-location facility directly but from a 3rd party that had extra space in the co-lo. Meaning if I had to do anything I had to call up this 3rd party, who put me on the list and then I could get in. If it was an emergency in the middle of the night, I had a problem, as I could not just show and do some work. I had to get pre-approval from another company.


The server in South America was worse, since it was just a desktop pc motherboard grade piece of hardware (no remote management). If that had a problem with it, then I had to email someone and have him or her try to reboot the box.

The development environment consisted of a CVS source code repository server that had the “right” bash/ant scripts to create war files for some of the apps. The other apps where built via the Windows Laptop and the IDE it was using, either NetBeans or Adobe Flash Builder, depending on the application. There were no unit tests. There was however some Java “Main” programs spread throughout the code to exercise pieces of the system that was being worked on at the time.


The app used a homegrown Inversion of Control like framework (this kind of did the same thing as what the Spring Framework can do) and a custom ORM framework built in house, which was named DAL-J. I deciphered this to mean Data Abstraction Layer for Java and it included a custom tool to read the real database schema and create objects for data access. I take my hat off to the folks that worked on that.


The Need for DevOps

Does this sound like your legacy project? This series of articles will detail how I did it. So to recap this is what I was dealing with.

  • Multiple Legacy Systems
  • Older Source Control (CVS)
  • No Build Automation
  • No or Minimal Test Automation
  • No project management or bug tracker
  • Out of date libraries, frameworks, and software
  • Horrible data center situation, running on older and unsuitable hardware
  • System was so overwhelming, that people are quitting.


This series of posts will be part case study and part technical how-to on my DevOps approach to do more with less (people that is).


In the next article we will explore the goals for the retrofit and the benefits of doing so.

DevOps Logo

In this four part series I will go over how I added the DevOps software development methodology to a legacy project. This project consisted of a few Enterprise Java Applications/Systems, however this information will be relevant for any type of software development.

I joined a small company in need of some serious retooling and updates in the summer of 2012. The company will be the focus of this case study and will outline how the project was turned around. The case study will take a look at some popular tools used for DevOps, like Git, Jenkins, and Maven.

DevOps Retrofit Series

Automation was key to transforming the legacy applications. If I were to sum up what DevOps is with one word, it would be “Automation”. Manual Processes are error prone and takes more time to accomplish than using automation. This case study will show the old legacy manual processes and describe the methods used to automate them.

It took about 2 years to complete, however features can be prioritized and rolled out fairly quickly by a very small staff (1 Developer and 2 supporting employees that spend some of their valuable time helping with project management and testing). This article documents our journey.